Woodsmoke, Kayaks, and My Dad

Last weekend, my daughter camped out with other members of her mountain bike team on the night before the race. We dropped her off at the campsite before heading for our own, cozy hotel room.
The family camping area was packed to capacity. Kids ran around yelling; someone had a campfire going. The trees, the smell of woodsmoke, and the noise brought me back to the times my dad took us all camping, and my brother and I were the ones running around playing loud games. I vaguely recall helping out with the tent—something about poles that fit inside each other, perhaps matched by color? Sleeping bags, of course, and maybe air mattresses that had to be blown up? And Cutter’s, of course, to keep off the mosquitoes.
You can tell I didn’t really take to camping, since I haven’t camped for years. Still, standing there smelling the woodsmoke, I thought about my dad and was glad that he had taken us.
I thought about my dad a month or so earlier as well, when my daughter was going kayaking with members of Boat Club.  They needed another adult on the water. So I rented a plastic kayak along with the others and got in awkwardly. Once on the water, though, I really enjoyed it. I watched the kids messing around and wished that my dad could be there to see his granddaughter on the water—and to paddle his own kayak again.
Girl in plastic kayak
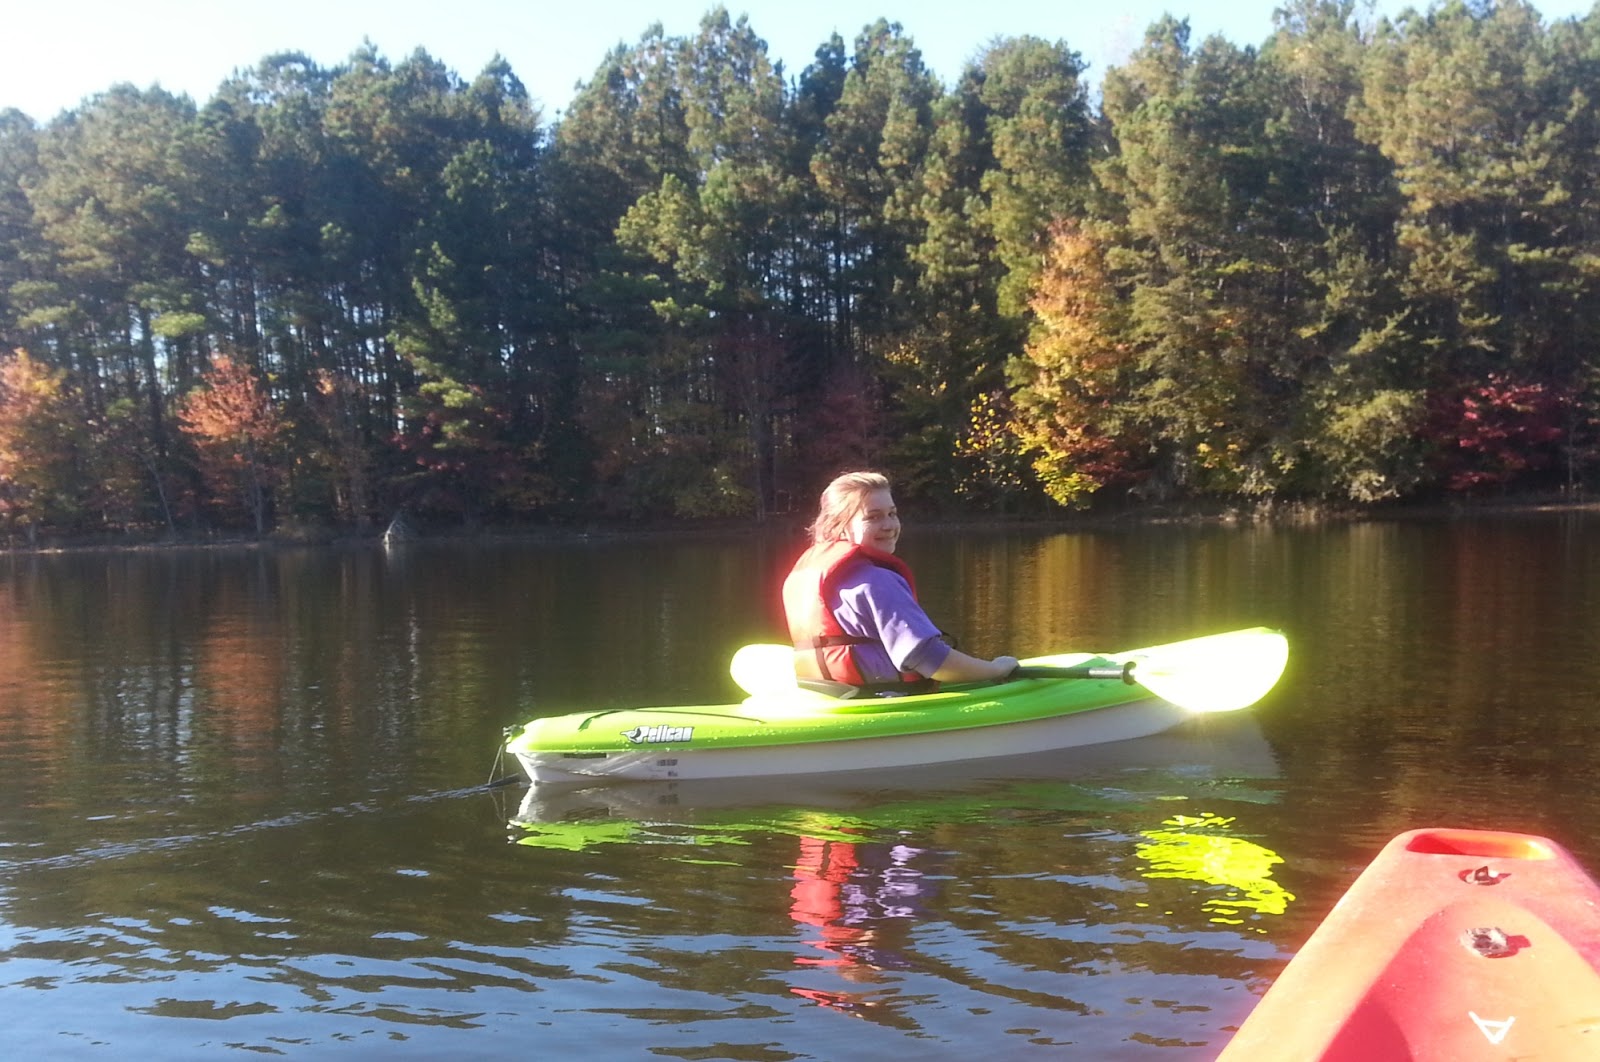
M out on the water in her kayak
I remember helping him put together the kayak when I was a kid. It came in several heavy canvas bags. Wooden pieces had to be slotted together, poles had to be inserted along the sides, and then the two ends had to be pushed into the rubberized hull before they could be locked together and the seat backs put in place.
Collapsible kayak Klepper Aerius in bags
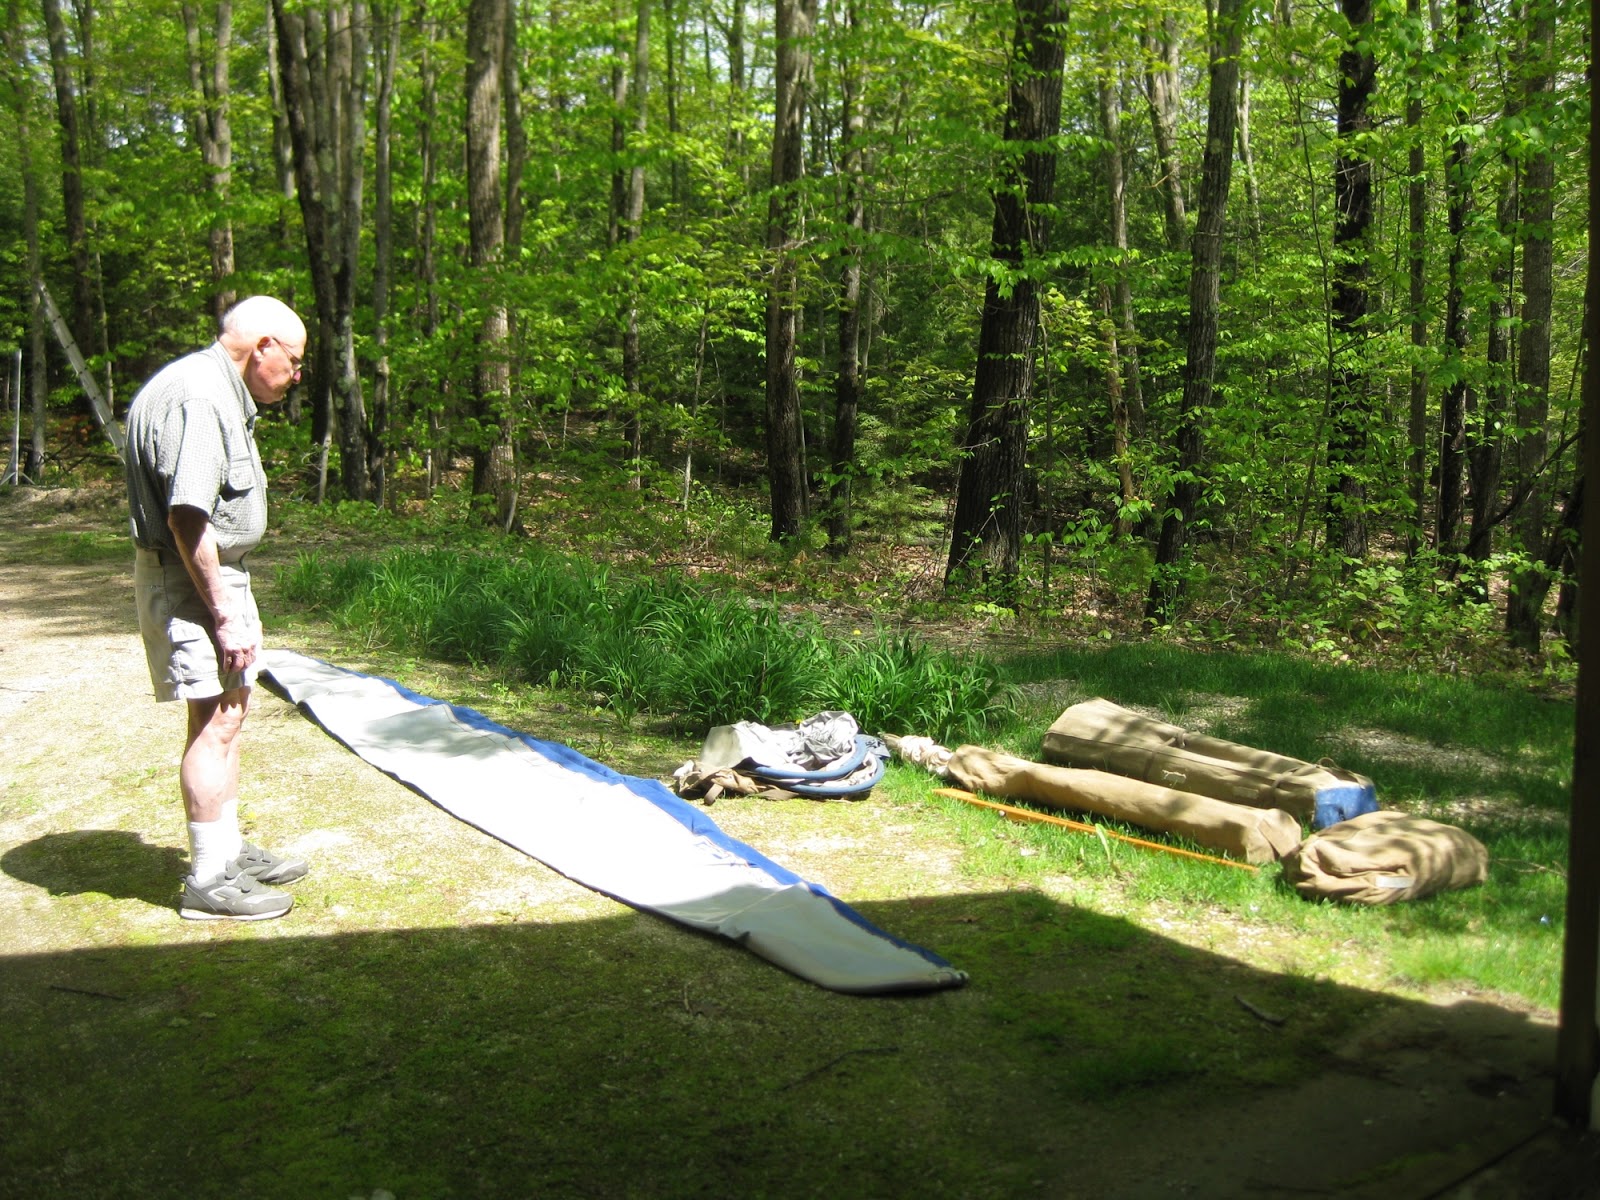
Taking a last look at the Klepper Aerius.
Then we would go out on the quiet lake and paddle around the edges. 
There are other things I learned from my dad. He liked to make things, sometimes from kits. I remember a down parka, a paper clock with a pendulum, and of course the electric organ, which took forever with all those wires to solder. I learned some basic skills from him as he carried out his projects—how to use the sewing machine, and how to cut and score paper. (I didn’t get into electronics, though he let me try soldering some wires.)
He also had a great interest in the latest technology and insisted on getting a computer back when it seemed like a crazy idea. I mean, who had a computer in their home?
But he got a Sinclair and it had so little memory that you could easily type in a Basic program and run out of room before you were done. And what do you know—he was right about computers being interesting. Now everyone has one.
He liked to garden as well, but since he also liked to travel and we moved every two years, his gardening was limited. I, on the other hand, was determined to live in one place when I grew up and have a really nice garden. But we shared a love of home-grown tomatoes. I always try to have tomato plants, even in years when the rest of the garden is in sad shape.
Girl in front of light-box with lettuces and other plants
Me as a kid in front of his light-box for growing plants
Light-box made from wire shelving with cardboard and foil for starting seedlings
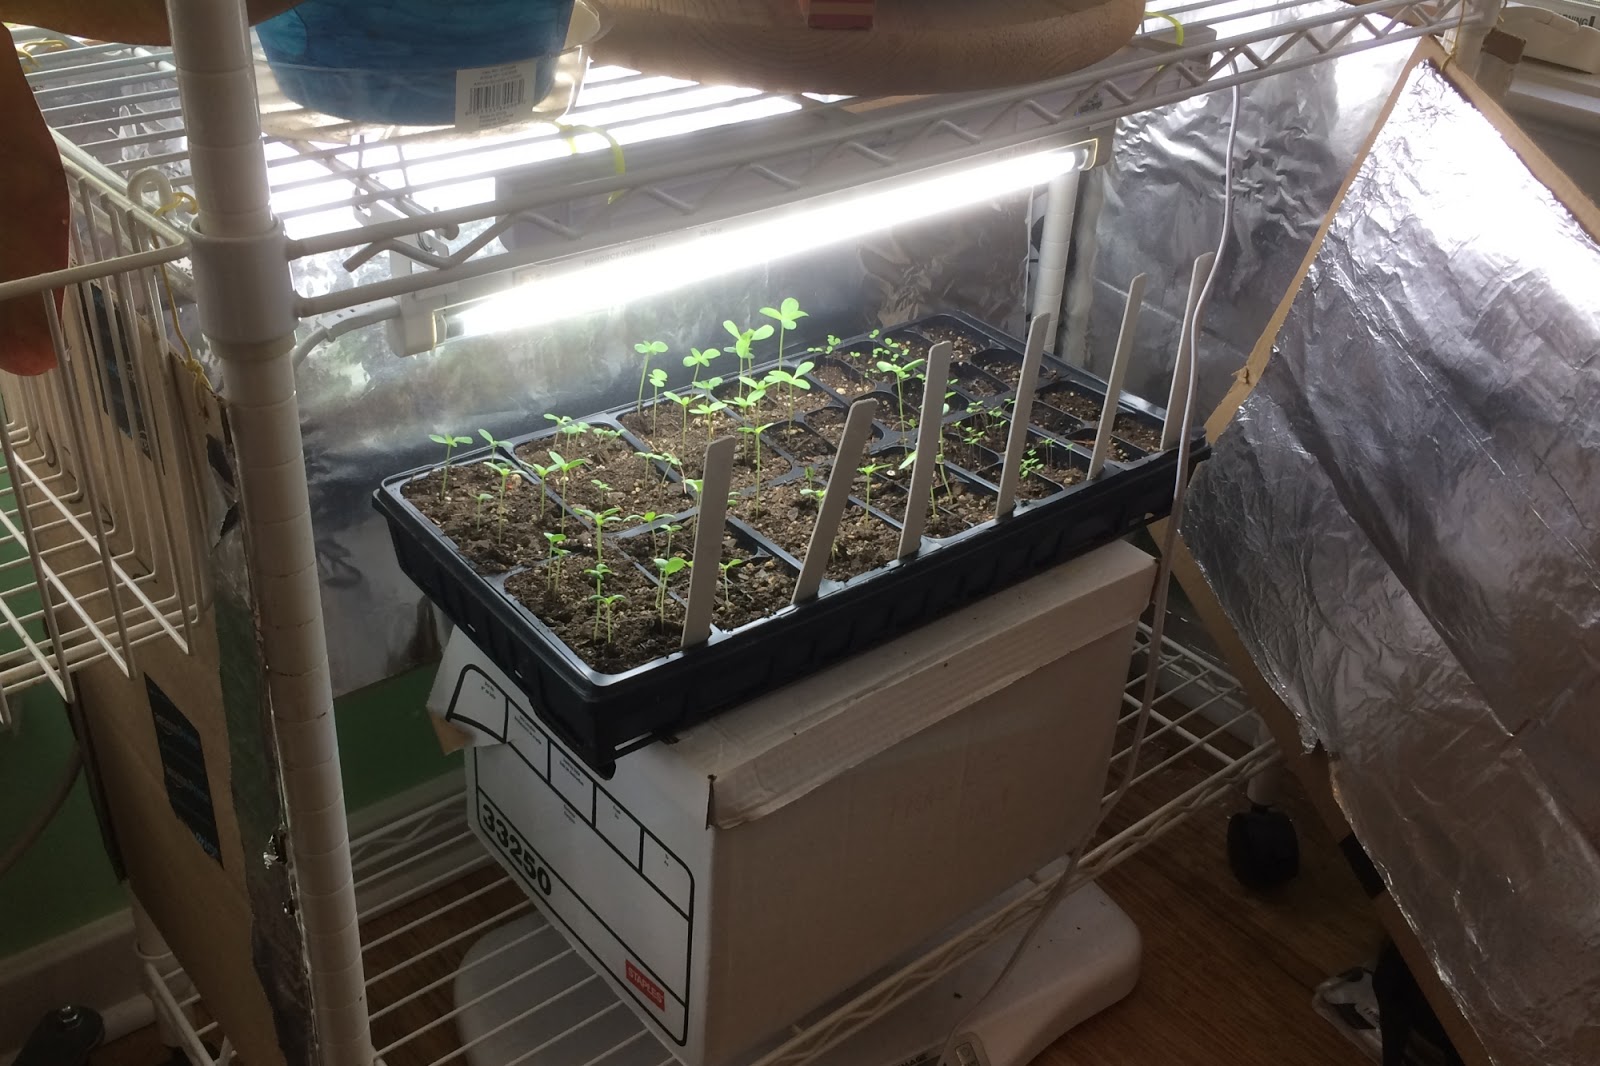
My own attempt at a light-box for starting plants
There were things my dad didn’t like, certainly. He was scornful of “ya-ya music”, which is what he called rock, and probably most music that followed it. (Did he get the term from the Beatles’ song “I love you, yeah, yeah, yeah, I love you, yeah, yeah, yeah”?) He abhorred the practice of having a TV in the living room (never in our house) or watching TV during meals. Really, he disliked most TV shows except documentaries.
And he could have the most irritating little smirk when he felt he was winning an argument.
Overall though, he had a lot of enthusiasm and a lot of interests. I wish that he could be here to share them with his granddaughter.

More Acanthus Scrolls, plus Homemade Envelopes

When I was looking for techniques for drawing that interesting foliage-like scroll, I found two useful sites. I made use of one of them in my last post, to draw a decorative scroll on a tuckbox. This time I tried Calligraphy Pen’s technique to make an interesting envelope. In doing so, I also discovered that my cut-and-paste skills need work.

Homemade envelope with acanthus scroll decoration
The finished envelope
 The envelope template that I used is from The Postman’s Knock. She offers a number of decorative printable envelopes, some for free. If you print them full size, they will hold a standard sheet of paper folded into quarters (important if you are making cards this way.) I traced around one and then started adding a scroll to the back flap of the envelope, and then started one that I wanted to go along the left-hand side of the envelope where it would not interfere with the readability of the stamp or zip code.
Here I have drawn a box lightly in pencil where I want the second scroll to go. You can see the one on the back flap already done.
Box penciled in
Here I have drawn the scroll in pencil.
Penciled-in scroll
Here I have gone over it in pen, and added some rather random shadows with a finer pen. If the art critiquer at SCBWI saw this, he would no doubt ask me where the heck my light source is supposed to be coming from. Oh well.
Inked-in scroll
Now that I’ve gone over it in pen, I have a sudden realization. This scroll is on the WRONG SIDE of the envelope. Oops. Rather than start over, I decide to cut and paste. Since my computer art skills are limited, I cut and paste in the original sense of the phrase, then use the photocopy function on my printer.
Envelope template with scrolls cut and pasted in
Unfortunately, I haven’t stuck the pieces down well enough and faint lines show where I have pasted. And it turns out there is not a single bottle of white-out in the house. I try white watercolor, and then I try running white gel pen over the faint lines on the photocopy.
Finally, I decide that this isn’t such a wonderful scroll anyway, and I may as well make an envelope out of the copy with faint lines. I’ll make a better scroll decoration some other day. Meanwhile, I have plenty of photocopies that I can color in different ways if I want.
Till next post.

Acanthus Scrolls, Florentine Papers, and Decorated Tuckboxes


For the past couple of weeks, I have been fascinated by acanthus scroll designs. It started when I received some address labels that reminded me of the scroll-like design on a box of fancy stationery. I pulled the box out and started trying to imitate the design, without much success.

Box of stationery covered with Florentine paper with leafy scrollwork
Stationery box with Florentine paper cover
There is a tangle pattern (ZentangleTM) called “Icanthis”. It gets its name from the acanthus leaf, which shows up in stylized form all over the place. The design on the stationery box was a kind of leaf-like scroll, but not very much like the Icanthis tangle. So I turned to the internet. “Acanthus leaf”, “foliage scrolls”, “acanthus scroll”, and so on. There were all sorts of interesting images.
One thing I found out is that the paper I so admired is probably made by Rossi, a company in Florence, Italy. Such beautiful designs and colors! And of course, there are the accents in powdered gold—I think I may have said before that I like shiny things?
I also found tutorials on making two somewhat different types of acanthus scroll. One is a webpage on “Acanthus Drawing” by “Maitresse Yvianne”. I had a lot of fun trying out the design. I made a card and a tuckbox (photos below), but I didn’t add the turned-up leaf tips. I’ll have to try that another time. The other was a post in a blog called “The Calligraphy Pen”. This style makes a nice border.
While working on these, I drew acanthus scroll type designs all over the place, trying to find the ones I liked best.
Sheets of paper with sketches of acanthus scroll patterns
Acanthus scroll sketches
Eventually I decided to make some samples from the Yvianne tutorial, in part because it is a little easier. If you skip the turned-over leaf tips, you don’t even need pencil guidelines (though I used guidelines to get nice curves on the scroll.)
Pencil guidelines on card
Pencil guidelines
Acanthus scrolls inked over pencil guidelines on card
Drawn in ink
Acanthus scrolls on card colored with colored pencil
Colored with colored pencil
I didn’t really like the way the pencil coloring turned out. Maybe I should have used different colors, or just colored it more simply. So I decided to use watercolor for the next one and make a tuckbox (see Make Your Own Tuckbox).
Tuckbox paper pattern with pencil guidelines
Pencil guidelines on cut-out tuckbox
Tuckbox paper pattern with acanthus scrolls
Drawn in ink
Tuckbox paper pattern with acanthus scrolls and watercolor
Colored with watercolor.
Tuckbox with acanthus scroll design
The finished tuckbox.
Maybe I will use a gold gel pen on the next one and add some dots or squiggles. I like this design, but I left a lot of empty space. I think this style of scroll would look nice at the top of a letter, or maybe on a nameplate, but to turn it into decorative paper would require adding a lot of extra loops and flowers and details.
Of course, that could be fun, too.
Till next post.